Ah sorry for two MK posts in a row, but I was just so excited that! So with Valentine's Day just next week, I'm sure you are already planning out your perfect outfit. Valentines' Day always make me think of Rosegold and red's, so here is the perfect makeup look for it! My best friend, Eva, agreed to be my model and try out these amazing colors.
- CC Cream (Eva used Medium-Deep)
- Mineral Powder Foundation
- Eye Primer or Cream Eye Color (We used the Beach Blonde Cream Eye Color, it works just like an eye primer, but adds a bit of shimmer.)
- Mineral Eye Colors in Sweet Cream, Rosegold, & Copper Glow
- Gel Eyeliner
- Lash Love Mascara
- Bronzing Powder
- Mineral Cheek Color Duo in Ripe Watermelon
- NouriShine Plus Lip Gloss - Berry Dazzle
First things first, foundation! We used the CC Cream and then the Mineral Powder Foundation to help create a 'blank canvas'. Then you can either use the Eye Primer or a Cream Eye Color and put it all over both eyelids, even up to your brow. We used the Beach Blonde Cream Eye Color, it is super easy to put on and adds just a little bit of shimmer to your eyelids. (Plus it's waterproof and lasts up to 12 hours! Score!)
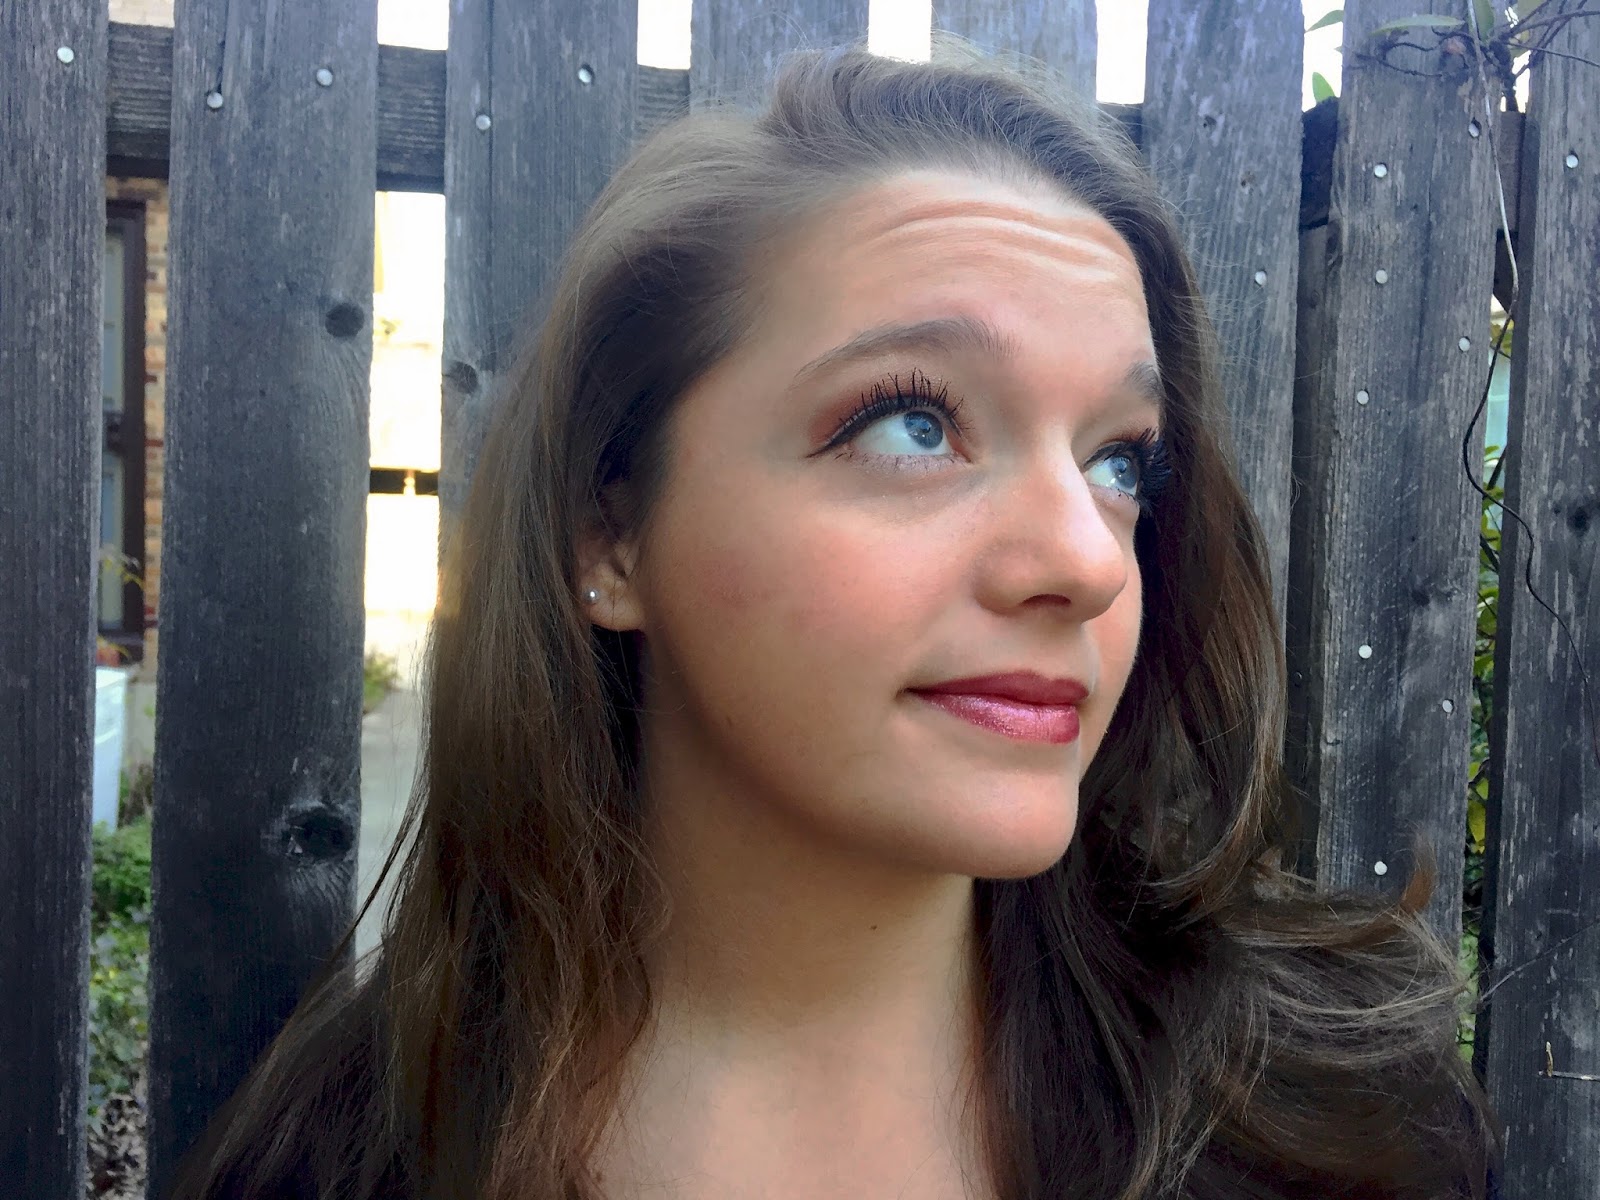
Then add the Rosegold Mineral Eye Color all over your lid. Next put the Sweet Cream right under your brow and then in the inner corner of your eye, right next to your nose. Finally add the Copper Glow in a 'C' shape, right from the middle of the crease, around the outer corner and right above your top lashes. Both the top and bottom of the 'C' shape should stop about the middle of the eye. I made it a bit darker in the crease, for added emphasis.
After you have the mineral eye colors done, use the Gel Eyeliner to create a thin line above your top lash line. With this a little bit goes a long way, so be careful and go slowly. Add some Mascara on the top lashes and the bottom ones, if you want. There is no rule about having to apply it to both top and bottom. Miss Eva loves her thick lashes!

Then we used the Bronzing Powder to contour in a very easy way. When applying it, think of the shape of an E or 3, depending on which side your are working on. Top of the shape is your forehead and bottom is your jawline. The middle is your cheek. Make sure to blend, blend, blend. You don't want stripes all over your face! Next was the Mineral Cheek Duo, these are one of my favorites! It comes with a bright blush and a highlighter. First, we applied the highlighter right around Miss Eva's eyes in a C shape. It's perfect to use right around the eyes, because you want them to look bright and pop out, not dark and sleepy. Then gradually add the blush to your cheeks, as they are bright colors and remember to keep blush about two fingers away from your nose.


Finally, lips! We used the wonderful Berry Dazzle Lip Gloss. And there you go, a wonderful new look just in time for Valentine's Day. Let me know what you think in the comments!
XOXO,
Suzanne Marie
No comments:
Post a Comment